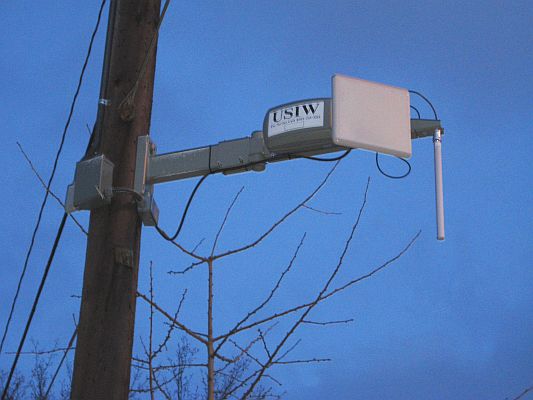
Wednesday, December 7, 2011

Municipal Wireless Network


Places that cant be reached by telcos cant have internet. Truth is we came up of an idea, what if we put up our own network and provide my friend in the bundocks internet. and when i say internet its gonna be a broadband with like 10 mbps download. (I recently read the newspaper that PLDT partnered with Chinese to give them the fiber optic technology) And that is possible me the provider give this friend the Internet, which will just say the cost of the link will be like 12 Php. with two devices to bridge them and that will be 3 or 5 kilometers and its a snap and youl be surprised with the cost of this, you don't have to dig holes or lay any cables and using the unlicensed channels of wi-fi . and why shoud i just provide one person ill provide them that need them because smart cant give them or globe cant give them this.

The potentials are limitless by practical use. For example you need a lan link to play lan games DOTA, HON, counterstrike, database connectivity from all branches of your stores, even intranet communication..

The Uses Are Endless ... Tell me a thing or two if you want this to be implemented on your premises or your campus ill be glad to help you. iloilocity.info or by email acjaen@iloilocity.info

video link for pico station configuration

http://www.youtube.com/watch?v=fOC7Re-V50Y

ubiquiti picostation simple access point howto


Line of sight is important to give you more range if you are using a laptop ... we need the ubiquiti picostation m2 hp which you can buy from roughclaw cavite.... which includes the 6 dbi antenna and poe and a mounting tie behind the device. the other things you need are pc 133 computer with hard disk or you can also boot using your usb drive for monowall install just need 12 meg. and your internet connection ... monowall needs 2 nic devices which you have to configure 1 of them as wan and lan.
connect a straight thru cable on the inside port of the picostation.
and configure youre pc to configure the picostation.

Connecting your device to your network is very easy, as it’s using the POE (Power Over Ethernet)
technology. For this you will need two direct Ethernet cable (RJ45) and the power adaptator provided.
First of all connect one cable to the POE entry and connect the other end to the device. The other cable is
connected between the LAN entry and your Ethernet computer access.
Now just connect the power adaptator to the DC plug

Configuring your computer in able to set up your device.
This chapter will explain you how to set up your network connection to get access to the device.
 In your computer, open Control Panel > Network Connections > Local AreaConnection.
 In Local Area Connection Status > General, click Properties.
 In Local Area Connection Properties > General, select Internet Protocol (TCP/IP) and click
Properties.
 In Internet Protocol (TCP/IP) Properties > General, select Use the following IP address.
 Enter your IP address and Subnet Mask. The default IP address of the radio is 192.168.1.21, which
cannot be used here. So type IP address 192.168.1.21 and gateway 192.168.1.20
 Click OK and Close

your browser (e.g. Internet Explorer, Firefox, Opera, etc.) and type in address bar: http://192.168.1.20
(The default address of the Pico) then press the Enter key.
When the connect page appears type the default username “ubnt” and password “ubnt” below:

Simple AP (Access Point)
We consider this simply network topology:
One Router/Gateway connected to Internet and/or private LAN (IP Address: 10.10.10.254/24)
One AP AirOS device directly connected to Router (IP Address: 10.10.10.253/24)
One or more Wireless Clients (Notebook, WiFi-Phone, other Wireless devices...)
The Router assigns IP Address to network devices by DHCP Server. Alternatively, if you prefer, you can set
static IP Address on Client.


Wireless Mode: Access Point
 SSID: yourSSID (or any other string to identify your WLAN)
 Country Code: set according your country
 IEEE 802.11 Mode: B/G mixed (assuming devices running in 2.4 GHz)
 Channel: 1 - 2412 MHz (or any other free channel)
 Output Power: 10 dBm (or check Obey Regulatory Power according your country law)
 Data Rate, Mbps: 54, Auto

dont forget to click change below (dont click apply yet

)
In NETWORK TAB, set:
 Network Mode: Bridge
 IP Address: 10.10.10.253 New IP address for the AP
 Netmask: 255.255.255.0
 Gateway IP: 10.10.10.254 IP address of your router/gateway
 Primary DNS IP: 10.10.10.254 (or DNS IP provided from your ISP)
 Secondary DNS IP: as Primary DNS

click change and apply

the device will reboot and will switch on again
connect to the device using 10.10.10.253 and click on the airmax tab and disable the airmax protocol and change the password of ubnt into something you remember.

set the lan part of monowall to 10.10.10.254 set the subnet to /24
enable dhcpd set the range to 10.10.10.1 up to 10.10.10.60

click on services and tic the enable captive portal and create a user configure captive portal to local authentication and create a captive portal there is a sample code below to where you can upload a page. create a user that you can use and save.

connect the wan part of monowall to your internet connection.